How to Install a ClearBlue Mineral System on an Aboveground Pool
Installing a ClearBlue Mineral System on your aboveground pool is a straightforward and rewarding process that enhances water quality while significantly reducing the need for harsh chemicals like chlorine. By incorporating this advanced system into your pool setup, you’ll enjoy cleaner, clearer, and healthier water that’s gentler on the skin, eyes, and the environment. The ClearBlue system not only makes pool maintenance easier but also promotes a more eco-friendly and cost-effective way to keep your pool in pristine condition. Proper installation ensures the system operates at peak efficiency, providing long-lasting benefits for you and your family. Follow this detailed step-by-step guide to complete the setup effortlessly and maximize the advantages of ionized water in your pool.
What You’ll Need
To ensure a smooth installation process, it’s essential to gather all the necessary tools and materials before starting. Having everything within reach will save time and make the setup more efficient. Here’s a checklist of what you’ll need:
- ClearBlue Mineral System: This includes the control box and the electrode chamber, both of which are crucial for the ionization process. Ensure you have all components from the packaging.
- Screwdriver or Drill: For mounting the control box securely to a nearby surface. A drill may also be needed if the mounting surface requires additional preparation.
- PVC Pipe Cutter or Hacksaw: To create a clean, precise cut in the return line of your pool’s plumbing system for installing the electrode chamber.
- Teflon Tape: Used to wrap the threaded connections of the electrode chamber to create a watertight seal and prevent leaks.
- Hose Clamps: These are used to secure the electrode chamber to the PVC pipe, ensuring it stays in place during operation.
- Pool Pump and Filter System: These must already be installed and operational, as the system is integrated into the existing plumbing system to treat water as it circulates.
- User Manual: The ClearBlue Mineral System user manual provides essential instructions and guidance for installation, troubleshooting, and operation. Keep it on hand for reference throughout the process.
Additional Preparations
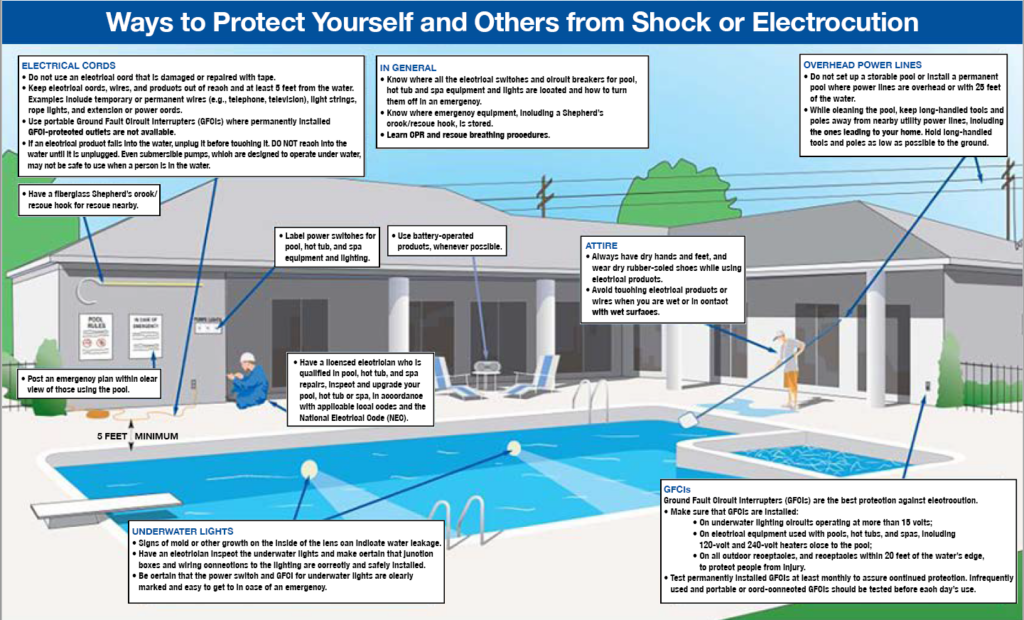
Before you begin, inspect your pool’s plumbing to identify the best location for the electrode chamber. Ensure the area is clean and free of debris that could interfere with installation. If your pool pump and filter have been running, turn them off and allow the system to settle. This will make handling the plumbing safer and more manageable. Finally, verify that the electrical outlet intended for the control box is GFCI-protected to ensure safety during operation. Taking these preparatory steps will set the stage for a smooth and hassle-free installation.

Getting Started with Your ClearBlue Mineral System Installation
Setting up your ClearBlue Mineral System for your aboveground pool is a straightforward process that combines modern technology with user-friendly design. By following these detailed steps, you’ll be able to install the system efficiently, ensuring your pool remains crystal-clear and healthy with minimal chemical use. Each step is designed to guide you through the process, from selecting the perfect installation location to balancing your pool water for optimal ionization. Whether you’re a DIY enthusiast or a first-time pool owner, this guide will make the installation simple and stress-free.
Step 1: Choose the Installation Location
The first step in installing your ClearBlue Mineral System is selecting the best location for the electrode chamber. Choose a spot on your pool’s plumbing line, ideally after the pool pump and filter. Installing the chamber here ensures that only clean, filtered water flows through the ionizer, maximizing its efficiency. Make sure the selected area is easy to access for future maintenance, such as cleaning or replacing parts. Additionally, ensure the control box will be within reach of an electrical outlet, preferably one that is GFCI-protected for safety. Planning the location carefully now will save you time and effort later.
Step 2: Turn Off the Pool System
Before you start the installation process, it’s essential to turn off the pool pump and filter system. This step prevents water from flowing through the pipes during installation, reducing the risk of leaks or water damage. Double-check that all equipment, including the pump, is completely powered off. For added safety, unplug any connected devices to eliminate the risk of accidental power surges while you’re working. Taking this precaution ensures a smooth and hassle-free installation process.
Step 3: Cut the PVC Pipe
Using a PVC pipe cutter or a hacksaw, carefully cut a section of the pool’s return line where you plan to install the electrode chamber. Measure twice to ensure the chamber will fit snugly and that the cut doesn’t disrupt the water flow. It’s a good idea to keep a towel or bucket nearby to catch any residual water left in the pipe. Once the section is removed, inspect the cut edges and smooth them out if necessary to prevent leaks. A precise and clean cut is key to ensuring a watertight seal during installation.
Step 4: Install the Electrode Chamber
Proper installation of the electrode chamber is crucial for the system’s functionality. Start by wrapping Teflon tape around the threaded connections of the electrode chamber to create a watertight seal. Then, attach the chamber to the cut section of the PVC pipe and secure it with hose clamps or the provided fittings. Tighten the clamps evenly to prevent leaks but avoid over tightening, which could damage the fittings. Double-check that the chamber is installed in the correct direction, as indicated by the arrows on the chamber, to ensure water flows properly through the system.
Step 5: Mount the Control Box
Once the electrode chamber is in place, you’ll need to mount the ClearBlue Mineral System control box. Choose a stable wall or surface near the electrode chamber for mounting. Use a screwdriver or drill to securely attach the control box, ensuring it’s positioned away from direct sunlight, heavy rain, or other extreme weather conditions. Mounting it at eye level can make it easier to read and adjust the settings. A well-secured control box not only improves accessibility but also ensures durability and longevity.
Step 6: Connect the Electrode Chamber to the Control Box
Next, connect the electrode chamber to the control box. Locate the cable from the electrode chamber and securely plug it into the corresponding port on the control box. Ensure the connection is tight to avoid interruptions in the ionization process. Then, plug the control box into a GFCI-protected electrical outlet for safety. Confirm that all connections are secure and double-check the power source to avoid any electrical issues. Proper connections ensure that the ionizer functions smoothly from day one.
Step 7: Prime and Test the System
With everything connected, it’s time to prime and test the system. Turn the pool pump and filter back on to allow water to flow through the electrode chamber. Once the water flow is steady, power on the ClearBlue Mineral System control box. Adjust the ionization level based on your pool size; the user manual provides guidelines for optimal settings. As the system begins to operate, inspect the electrode chamber and all connections for leaks. If you notice any, tighten the fittings as needed. This step ensures the system is working correctly and ready for use.
Step 8: Balance Your Pool Water
After installation, it’s crucial to balance your pool water to optimize the ionizer’s performance. Test the water for pH, alkalinity, and calcium hardness, and adjust the levels to the recommended ranges:
- pH: 7.2–7.6
- Alkalinity: 80–120 ppm
- Calcium Hardness: 200–400 ppm
Properly balanced water enhances the ionizer’s efficiency in maintaining clean and clear pool water. Use a reliable pool testing kit to regularly monitor these parameters and make adjustments as needed. Balancing the water not only improves the ionizer’s functionality but also ensures a comfortable and safe swimming environment.

Step 9: Monitor and Maintain the System
To keep your ClearBlue Mineral System running at peak performance, regular maintenance is essential. Here are a few tips:
- Check the Ionization Levels: Use the control box to monitor the ionization levels and adjust them as needed to match your pool’s requirements.
- Clean the Electrode Chamber: Mineral buildup can affect performance, so clean the chamber every few months. Refer to the manual for specific cleaning instructions.
- Test the Water Weekly: Regular water testing ensures that the ionizer is effectively maintaining the pool’s cleanliness and chemical balance.
Step 10: Secure the System for Longevity
To ensure the ClearBlue Mineral System performs optimally for years to come, take these additional measures during and after installation:
- Weatherproofing: If the control box is mounted outdoors, consider installing a weatherproof cover or housing to protect it from the elements.
- Reinforce Connections: Periodically inspect the electrode chamber fittings and hose clamps to ensure they remain secure, especially after heavy pool use or cleaning.
- Backup Power: If your area is prone to power outages, consider using a surge protector or backup power supply to protect the control box from electrical surges.
Step 11: Educate Pool Users
A well-informed household or pool user group will help keep the ionizer running smoothly. Share the following tips with anyone using the pool:
- Avoid adding unnecessary chemicals that could interfere with the ionizer.
- Make sure swimmers rinse off before entering the pool to reduce contaminants.
- Report any unusual water conditions, such as cloudy water, promptly to address potential issues.
Step 12: Winterizing Your ClearBlue Mineral System
If you live in a region with cold winters, properly winterizing the ClearBlue Mineral System is crucial to avoid damage during the off-season:
- Turn Off the Ionizer: Disconnect the control box and store it in a dry, temperature-controlled environment.
- Drain the Electrode Chamber: Remove the chamber from the plumbing system and drain any remaining water to prevent freezing.
- Clean and Store Components: Clean the electrode chamber and any other parts before storing them for winter to ensure they are ready for use when the pool reopens.
Step 13: Schedule Regular Professional Inspections
While maintaining the system yourself is manageable, scheduling an annual professional inspection can ensure everything is running at peak performance. A pool professional can:
- Assess the electrode chamber for wear and tear: They’ll check for signs of corrosion, mineral buildup, or damage that could affect the ionizer’s efficiency. Replacing worn components on time can prevent bigger issues.
- Verify the electrical components of the control box: Ensuring the control box is delivering the correct voltage and functioning properly is crucial for consistent ionization performance.
- Provide advanced troubleshooting for any performance issues: If your ionizer isn’t working as expected, professionals can identify and resolve complex issues, ensuring uninterrupted operation and optimal water quality.
Step 14: Upgrade Your Pool Care Routine
To maximize the benefits of your ClearBlue Ionizer, consider pairing it with other pool maintenance best practices:
- Use a high-quality pool cover to reduce debris and evaporation.
- Invest in an automatic pool cleaner for easy upkeep.
- Maintain a log of water test results and maintenance activities to track the ionizer’s effectiveness over time.
By incorporating these steps into your installation and maintenance routine, you’ll ensure your ClearBlue Ionizer delivers consistently clean and healthy water for years to come. Proper maintenance not only extends the lifespan of your ionizer but also guarantees consistently clean and healthy pool water for you and your family.

Enjoy Clean and Hassle-Free Pool Water
Installing a ClearBlue Ionizer on your aboveground pool is a simple yet powerful way to enjoy clean, low-maintenance water. By reducing your reliance on harsh chemicals, the ionizer makes your pool more eco-friendly and healthier for swimmers. The ionizer helps minimize the risk of skin irritation, eye redness, and unpleasant odors commonly caused by traditional pool chemicals.
With proper installation and regular upkeep, you can enjoy crystal-clear water all season long with minimal effort. The system also extends the lifespan of your pool equipment by reducing the buildup of scale and other mineral deposits.
For detailed instructions, always refer to the ClearBlue Ionizer user manual or contact customer support for assistance. ClearBlue’s team is ready to help you with any questions or concerns to ensure optimal performance and satisfaction.


