How to install the ClearBlue Mineral System on an inground pool
Pool ionizers are catching on as the easiest and most natural way to sanitize swimming pools. This post describes installing the ClearBlue Mineral System, but most steps are the same for all ClearBlue Ionizer systems installed in hard-pipe pool plumbing.
Click here for installation instructions on using threaded fittings for the flex hose
Tools and Materials
The tools and materials you need for this job are:
- Sawsall or hacksaw
- PVC cleaner and glue
- Measuring tape
- Marking pen
- Wire strippers
- Screw drivers (Phillips and slotted)
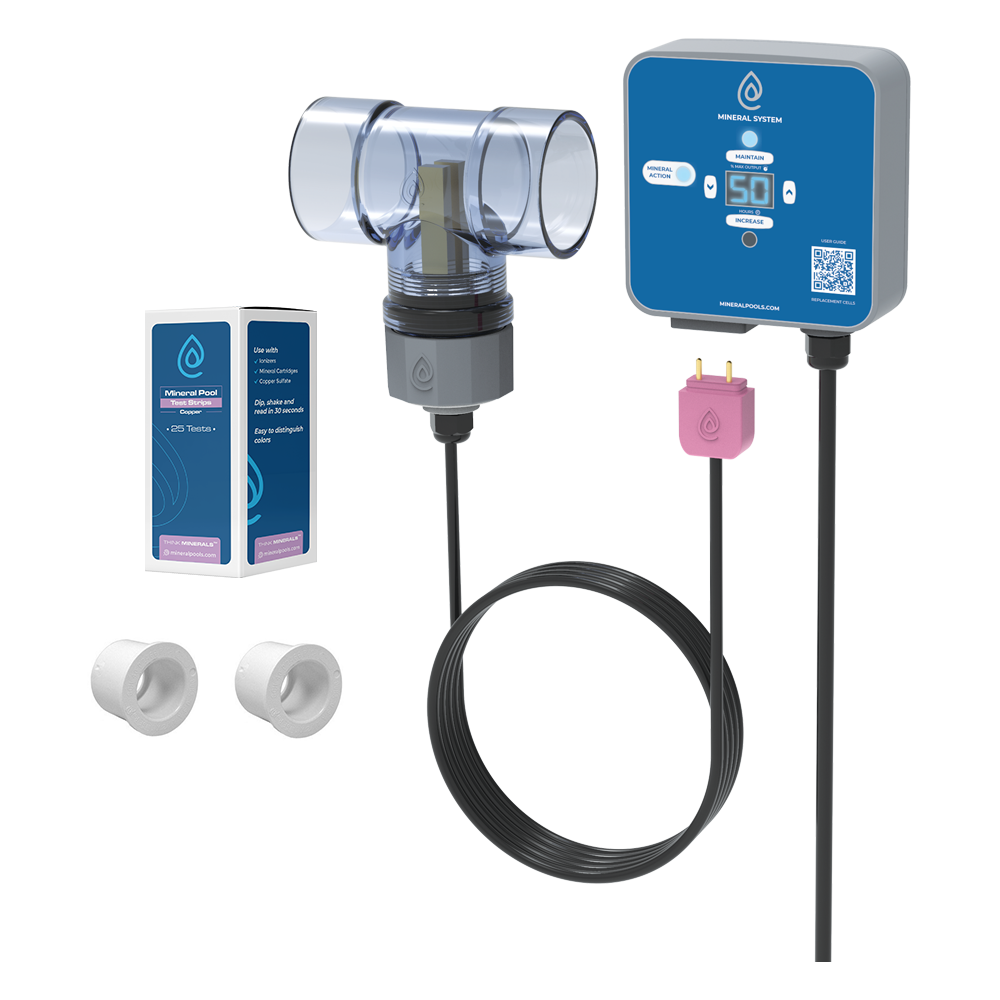
ClearBlue Kit Components
The ClearBlue Mineral System kit includes the following components:
- ClearBlue controller
- Mineral cell
- 2″ clear PVC tee
- 1.5″ PVC reducers
- Copper test strips
Planning
Planning out the controller installation and tee before you start cutting into the plumbing is essential.
The controller should be placed in a protected area from direct elements. Although it is rated for outdoor use, it will last longer if it is protected.
When planning the installation, consider two cables. The controller’s power cable is about 6 feet long, and the cell cable is around 4 feet long. Thus, you have about 10 feet of cable to work with. Make sure that the tee and controller are placed so that the cell cable can reach the controller and the power cable can reach the power outlet or electrical panel.
Note: If the cable length is insufficient for your configuration, 10-foot mineral cell cable extensions are available. Ask your pool supply store or builder to order one.
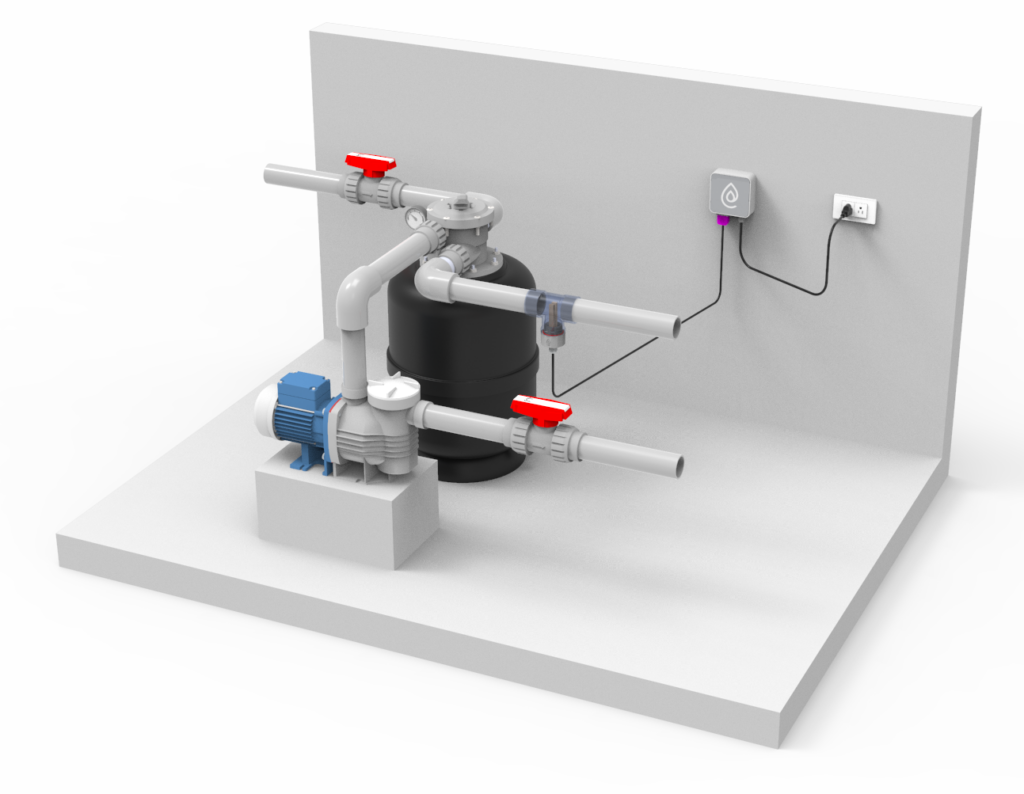
The tee should be placed on the return line after the pump, filter, and heater and before the salt cell (if applicable). If there is no room on that stretch of plumbing, it can be placed anywhere, and it will still work.
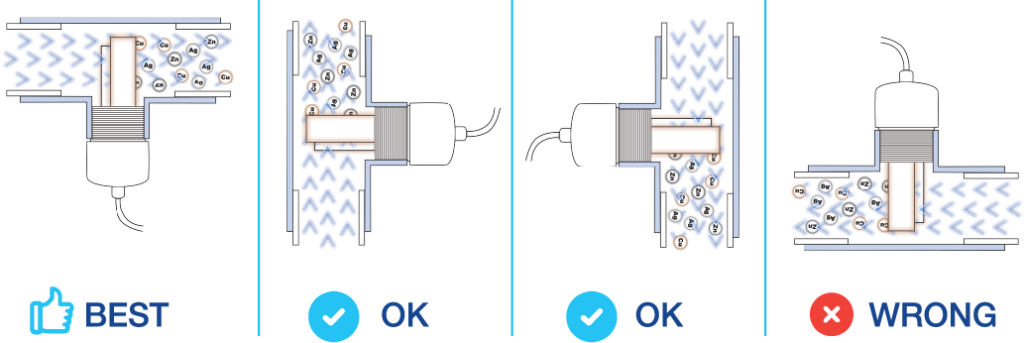
The tee should be oriented such that the mineral cell screws in from the bottom and the bars point upwards. This is the best way to get the maximum life out of the cell. However, if there isn’t enough room to install the tee this way, it can be installed horizontally so that the bars are parallel to the ground. It is not recommended to install the tee so that the cell screws in from the top and the bars are pointing downwards because you might get an air pocket in the tee around the electrode bars, and you will not get maximum efficiency or most extended life from the cell.
Warning: Before you start cutting into the plumbing, it is essential that you shut off the pump.
It is also important to shut off the shut-off valves in your setup. If you do not have a valve that shuts off the water flow from the jets, you can get plugs for the jets that stop the water from going back through the jets and out of the cuts you are about to make.
Step 1: Install the Tee
Measure a 2.5″ gap on the PVC pipe where you want the tee to go. Cut out this gap to glue in the tee.
Cut out this 2.5″ section of pipe with a sawsall or hacksaw.
Let all of the water drain out of the pipe.
Warning: If you have not shut off all water flow via valves or jet plugs, the water will drain rapidly from the pool, and you cannot glue it in the tee.
Ensure the pipe is dry before applying the PVC cleaner and glue.
Apply PVC cleaner and glue to both the inside of the tee and the outside of the pipe.
Slide the tee over the pipe and give it a quarter turn to ensure the glue coats evenly.
Step 2: Install the Mineral Cell
Once the tee is in place, you can screw in the mineral cell.
The cell has a rubber O-ring that seals it against the tee. You do not need Teflon tape on the cell threads.
Tighten the cell until it is hand-tight. Do not use a wrench or other tool, as this might crack the tee or make it hard to release when it is time to change it.
Ideally, the cell should be turned so water flows between the two bars. This will help them wear evenly. If the bars don’t line up perfectly when the cell is fully threaded in, it’s not a big deal. The main thing is that the cell is sealed against the tee so it doesn’t leak.
Step 3: Mount the Controller
The controller can be mounted to any flat or textured surface using the included velcro strips. For flat surfaces, two strips are enough and should be placed over the screw mounts on the back of the controller. Four strips are recommended for textured surfaces like brick and stucco.
Step 4: Plug Everything In and Restart The Pump
The final step is to plug in the two cables. The pink cell connector plugs into the pink receptacle on the controller. The black power cable must be plugged into a GFI-protected outlet or wired to a panel with breakers, as demonstrated in the video.
Open any closed valves and restart the pump.
When the tee is filled with water, the ‘Mineral Action’ light switches from flashing red to either flashing blue (Increase mode) or solid blue (Maintain mode) to indicate that the system is ionizing.
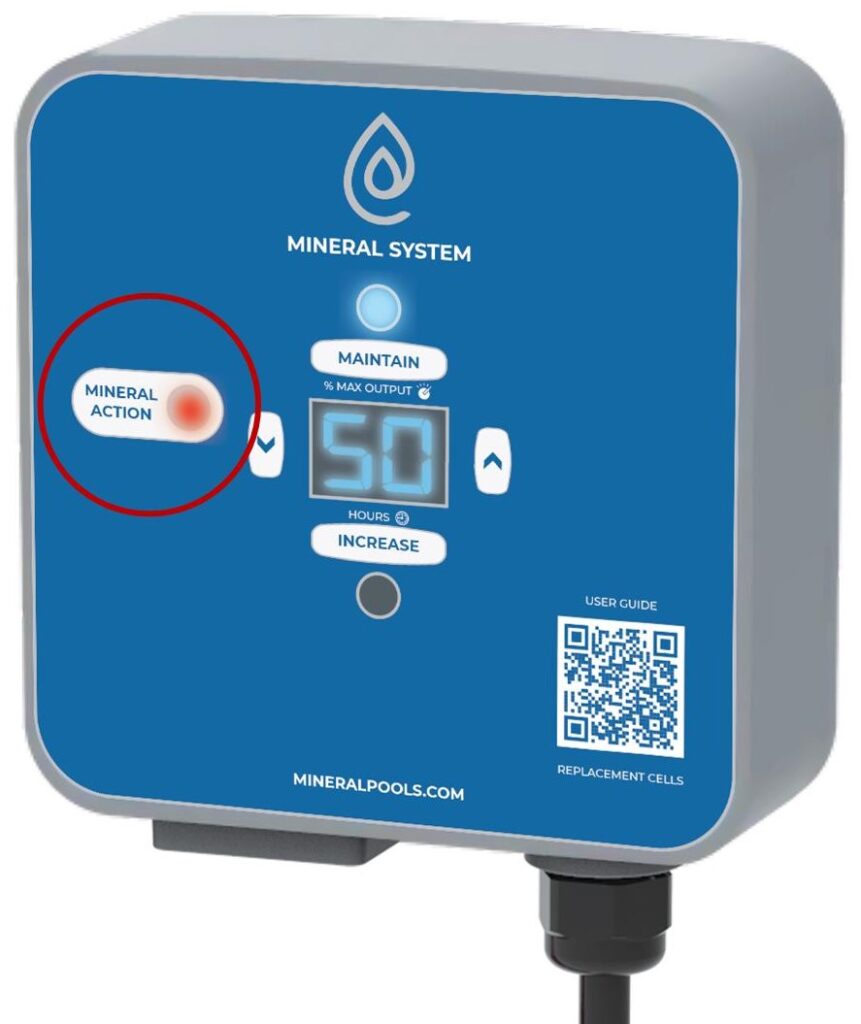
Step 6: Set Up the Controller
There are two settings: Maintain, which is the maintenance setting, and Increase, which is a ramp-up setting.
The manual provides the settings for both Maintain and Increase according to your pool volume in gallons or liters, or you can consult the settings calculator.
Set the Maintain setting first, then set the Increase mode. The system will run on Increase for the number of hours set and automatically switch to the Maintain setting for maintenance.
Step 7: Testing
Once the Increase mode expires, test the water with the test strips. The ideal copper level for maximum performance and cell life is 0.3 ppm. The other minerals are added proportionately, but copper is the easiest and cheapest to test for.
If the copper level is not reading 0.3 ppm, you can rerun the Increase mode. Repeat the Increase mode until you reach 0.3 ppm of copper or your desired level. A level of 0.2 ppm is still adequate while providing a little more life to the cell. You can run the level as high as 0.4 or 0.5 ppm for more mineral activity, but the cell will not last as long.
Are you thinking about a ClearBlue for your hot tub as well? Check out this post on how to install a hot tub ionizer.
Want to learn more about the benefits of pool ionizers?
Questions or concerns? Let us know!
Happy swimming!